Have you ever wondered how to customize default columns in Splunk charts? Well, you’re in luck because we’re here to guide you through the process step by step. Splunk is a powerful tool for analyzing and visualizing data, and knowing how to tweak default settings can help you make the most out of your charts.
When you create a chart in Splunk, it automatically sets certain columns as default. However, you may want to change these columns to better suit your data analysis needs. By customizing default columns, you can display the information that is most relevant to you and your team.

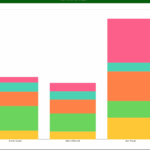
Splunk Chart Default Columns
Splunk Chart Default Columns
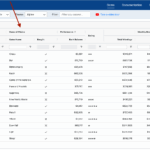
To modify default columns in your Splunk chart, simply navigate to the settings menu and look for the option to customize columns. From there, you can add, remove, or rearrange columns as needed. This allows you to tailor your chart to display the data that is most important to you.
By adjusting default columns in Splunk charts, you can streamline your data analysis process and gain valuable insights more efficiently. Whether you’re tracking performance metrics, analyzing trends, or monitoring system logs, customizing default columns can help you visualize your data in a way that makes sense for your specific use case.
Don’t be afraid to experiment with different column configurations until you find the setup that works best for you. Splunk offers a wealth of customization options, so take advantage of them to create charts that are both informative and visually appealing.
In conclusion, customizing default columns in Splunk charts is a simple yet powerful way to enhance your data analysis capabilities. By tailoring your charts to display the information that matters most to you, you can make more informed decisions and drive better outcomes for your projects and business initiatives.