Are you looking to create a simple column chart in Power Bi? Look no further! Power Bi is a powerful tool that allows you to visualize your data in an easy and effective way. In this article, we will guide you through the process of creating a simple column chart.
Before we dive into creating our column chart, make sure you have your data ready in Power Bi. Once you have imported your data, simply click on the “Insert” tab and select “Column Chart” from the visualization options. You can now start customizing your chart to suit your needs.
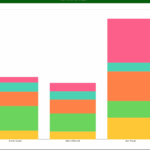
Simple Column Chart Power Bi
Simple Column Chart Power Bi
To add data to your column chart, drag and drop the desired fields into the “Axis” and “Values” sections of the chart. You can also customize the appearance of your chart by changing the colors, labels, and formatting options. Don’t be afraid to experiment and find the style that works best for you!
One of the great features of Power Bi is the ability to interact with your chart. You can hover over data points to see specific values, zoom in on certain sections, and even filter out data to focus on what matters most. This interactivity makes it easy to gain insights from your data.
Once you are happy with your simple column chart, you can easily share it with others by exporting it or embedding it in reports or presentations. With Power Bi, creating visualizations like column charts is simple and effective, allowing you to communicate your data in a clear and engaging way.
So there you have it – a quick and easy guide to creating a simple column chart in Power Bi. With just a few clicks, you can turn your data into meaningful insights that help drive decision-making and understanding. Give it a try and see the power of visualizing your data with Power Bi!