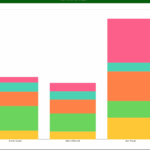
Are you looking to add a column chart graph to your presentation or report but not sure how to do it? Don’t worry, we’ve got you covered! Column charts are a great way to visually represent data and make it easier for your audience to understand the information you’re presenting.
Creating a column chart graph is simpler than you might think. With just a few easy steps, you can have a professional-looking chart that will impress your colleagues or clients. In this article, we’ll walk you through the process of placing your column chart graph below.

Place Your Column Chart Graph Below
Place Your Column Chart Graph Below
First, open the software or program you’re using to create your chart. Whether it’s Excel, Google Sheets, or another tool, the process is quite similar. Next, input your data into the spreadsheet, making sure to organize it in columns or rows depending on the chart type.
Once you’ve inputted your data, select the columns or rows you want to include in your chart. Then, look for the chart icon or option in the menu bar and choose the column chart style. Customize your chart by adjusting colors, labels, and titles to make it visually appealing and easy to read.
After you’ve customized your chart to your liking, it’s time to place it below your data. Simply copy and paste the chart into your presentation or report, ensuring it’s in a visible location for your audience. Make any final adjustments as needed, and voila! Your column chart graph is now placed below your data.
In conclusion, adding a column chart graph to your presentation or report is a simple and effective way to visually represent data. By following the steps outlined in this article, you’ll be able to create a professional-looking chart that will enhance your presentation and impress your audience.