Are you looking to create a column and line chart in Word for your next project? It’s easier than you think! With just a few simple steps, you can impress your colleagues with professional-looking data visualizations right in your Word document.
Whether you’re presenting sales figures, tracking progress, or comparing data sets, adding a column and line chart can help bring your information to life. Plus, it’s a great way to break up text-heavy documents and make key points stand out for your readers.
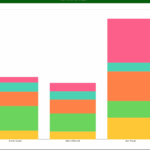
Column And Line Chart In Word
Creating a Column And Line Chart In Word
To get started, open your Word document and go to the Insert tab. From there, click on the Chart option. Choose the Column option from the menu that appears, then select the Clustered Column – Line on Secondary Axis chart style.
Next, input your data into the Excel spreadsheet that pops up. You can easily customize your chart by changing colors, fonts, and styles to match your document’s aesthetic. Once you’re happy with how it looks, simply close the Excel window, and your chart will automatically be inserted into your Word document.
Don’t forget to add a title, axis labels, and a legend to make your chart easy to understand at a glance. You can also resize and move the chart around your document to find the perfect placement for your content.
Now that you know how to create a column and line chart in Word, you can take your documents to the next level with eye-catching visual elements. Impress your audience and make your data more digestible with this simple yet effective tool.